1. Introduction
Windwos 11 is the new operating system from Microsoft which has been released recently as an upgrade for Windows 10. The core functionality of Windows 11 remains when compared to Windows 10 but with added functionality and enahance features and support.
However, Windows 11 system requirements are more strict and hence most likely to be compatible with only the most recent compyter systems. Microsoft System requirements for Windows 11 include a required support for TPM 2.0, UEFI, Secure Boot and a modern processor.
In this tutorial we will provide you with a step by step guide for Windows 11 upgrade. Of course, the main benefit of the upgrade process is to mainatain your data and programs. If you have Windows 10 already installed we will offer you advice on how you can upgrade to Windows 11 without data loss using the methods described below.
 Windows 11 Upgrade
2. Windows 11 Upgrade on Supported Hardware
Windows 11 Upgrade on New Computer
Windows 11 Upgrade with System requirements
If your PC satisfies all the upgrade system requirements, Windows 11 upgrade can be performed on supported hardware by following the steps below:
STEPS:
1. Download Windows 11 ISO file through the official Microsoft website.
2. Create a bootable media by using a utility such as Rufus.
3. In Rufus, select UEFI under partition scheme and target system.
4. Start your computer or laptop and access its BIOS.
5. Set the booting type to UEFI and enable Secure Boot and TPM.
6. If your PC does not boot, you may need to disable secure boot in the bios, after installation is complete, please re-enable secure boot.
7. Select boot from USB under boot order in system Bios, or press the relevant function key after power on to select the USB drive.
8. Start your computer and load Windows 10.
9. Click on Windows 11 ISO file which you have downloaded earlier and mount it as a drive to decompress the files. You can use a utility such as PowerISO for this purpose.
10. Using file explorer, you should now be able to see the contents of the ISO file. Click on the setup file to start the upgrade to Windows 11.
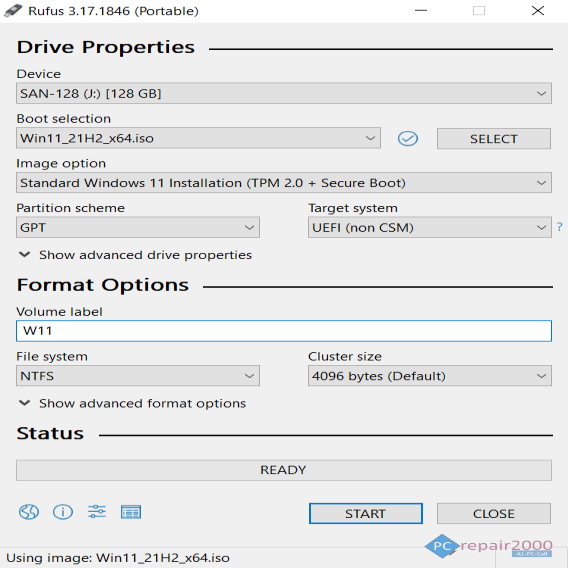 Create Bootable Media – Rufus Utility
3. Windows 11 Upgrade on Unsupported Hardware
Windows 11 Upgrade without System requirement
Windows 11 Upgrade without TPM 2.0
Windows 11 Upgrade without CPU Restriction
Windows 11 upgrade can be performed on unsupported hardware for older computers with a workaround bypass if certain conditions are met. Firstly, there must be some form of TPM support in the Bios, all versions of TPM should be fine, including TPM 1.2 and TPM 2.0. Secondly, UEFI and secure boot must be supported by by your PC hardware. There are no limitations applied to the CPU type during this procedure. For Windows 11 upgrade on older computers please follow these steps:
STEPS:
1. Enable secure boot and TPM in your system bios.
2. Start Windows 10.
3. Download Windows 11 ISO file from the official website.
4. Paste the following text into a notepad text file, and give it a name such as bypass.reg
———-
Windows Registry Editor Version 5.00
[HKEY_LOCAL_MACHINESYSTEMSetupMoSetup]
“AllowUpgradesWithUnsupportedTPMOrCPU”=dword:00000001
———-
5. Click on the newly created file (bypass.reg) and select yes to update your system registry.
6. Click on Windows 11 ISO file which you have downloaded earlier and mount it as a drive to decompress the files. You can use a utility such as PowerISO for this purpose.
7. Using file explorer, you should now be able to see the contents of the ISO file. Click on the setup file to start the upgrade to Windows 11.
Important Note:
If you have an older computer or laptop and does not support Trusted Platform Module (TPM), there is no wokaround to enable the upgrade process to Windows 11. This information is correct as of the time of writing this article. The alternative is to perform a fresh install of Windows 11 which is described in our other blog, Install Windows 11 from USB without TPM.
Windows 11 Upgrade – Unsupported Hardware
4. Blocking Upgrade to Windows 11
Remove Notification for Windows 11 Upgrade
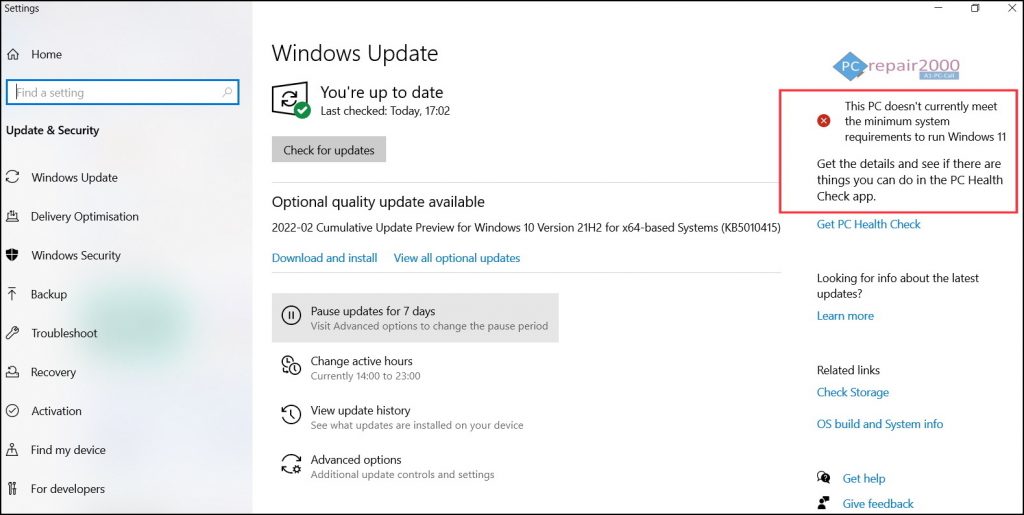
If you are running Microsoft Windows 10 operating system you may receive notifications for Windows 11 upgrade. These notification messages can be distarcting for some people and on occasion it can lead to accidental upgrade to Microsoft Windows 11. To stop windows 11 upgrade notification messages use the methods described below:
Method 1:
Stop Windows 11 Upgrade notifications using the registry method.
This method applies to all versions of Windows 11:
1. Press Windows key+R to start the command screen.
2. Type: regedit
3. The registry editor screen opens, navigate to the following directory:
HKEY_LOCAL_MACHINE\SOFTWARE\Policies\Microsoft\Windows\WindowsUpdate
if the WindowsUpdate folder does not exist, right clicking on the Windows folder and create a new key and give it the name WindowsUpdate.
4. Under WindowsUpdate, on the right pane, double click “TargetReleaseVersion”, if it does not exist create a new entry by right clicking on an empty space on the right pane and select new dword 32bit value and type TargetReleaseVersion. Click on “TargetReleaseVersion” and type 1 under value data field and select hexadecimal option then select ok.
5. Under WindowsUpdate, on the right pane, double click “TargetReleaseVersionInfo”, if it does not exist, create this entry by right clicking on an empty space on the right pane and select new string value and give it the name TargetReleaseVersionInfo. Select TargetReleaseVersionInfo and on the pop up window enter the maximum windows version value such as 21H2 under the field value data.
6. Restart your computer
Method 2:
Stop Windows 11 upgrade notifications using the local group policy editor.
This method applies to all versions of Windows 11 except the home edition.
1. Press Windows key+R to start the command screen.
2. Type: gpedit.msc
3. Navigate to the following directory on the left pane:
Local Computer Policy > Computer Configuration > Administrative Templates > Windows Components > Windows Update > Windows Update for Business
4. On the right pane, click on “Select the Target Feature Update Version”, new window should opens.
5. Under taget feature update, Select enabled and under target version for feature updates type the maximum version of Windows 10 that is allowed, for example 21H2.
6. Click apply then ok.
7. Restart your computer.
Please note that in order to receive updates or newer versions for Windows 10 you will need to update the maximum version number of Windows 10 manually again as described above, by changing the value of 21H2.
5. Summary
- You can install Windows 11 upgrade on supported hardware by meeting the system requirements for TPM, UEFI, Secure Boot and CPU type.
- Windows 11 Upgrade on unsupported hardware can be made by following our instruction for bypassing system requirements.
- If you are running Windows 10 and you wish to stop receiving Windows 11 upgrade notifications, please follow our instructions which was presented earlier in this guide.